Learn how to dehydrate apples right at home. Dehydrating apples at home is a simple and cost-effective way to preserve their freshness and enjoy them for longer periods.

By removing the moisture from the apples, you can concentrate their natural flavors and create a healthy snack that is perfect for on-the-go or adding to various recipes.
There are many benefits to dehydrating fruit like apples.
- Dehydrating fruit helps to preserve its nutritional value.
- Extend its shelf life.
- Is lightweight and portable, making it ideal for on-the-go snacking or adding to trail mixes.
Jump to:
How to Dehydrate Apples
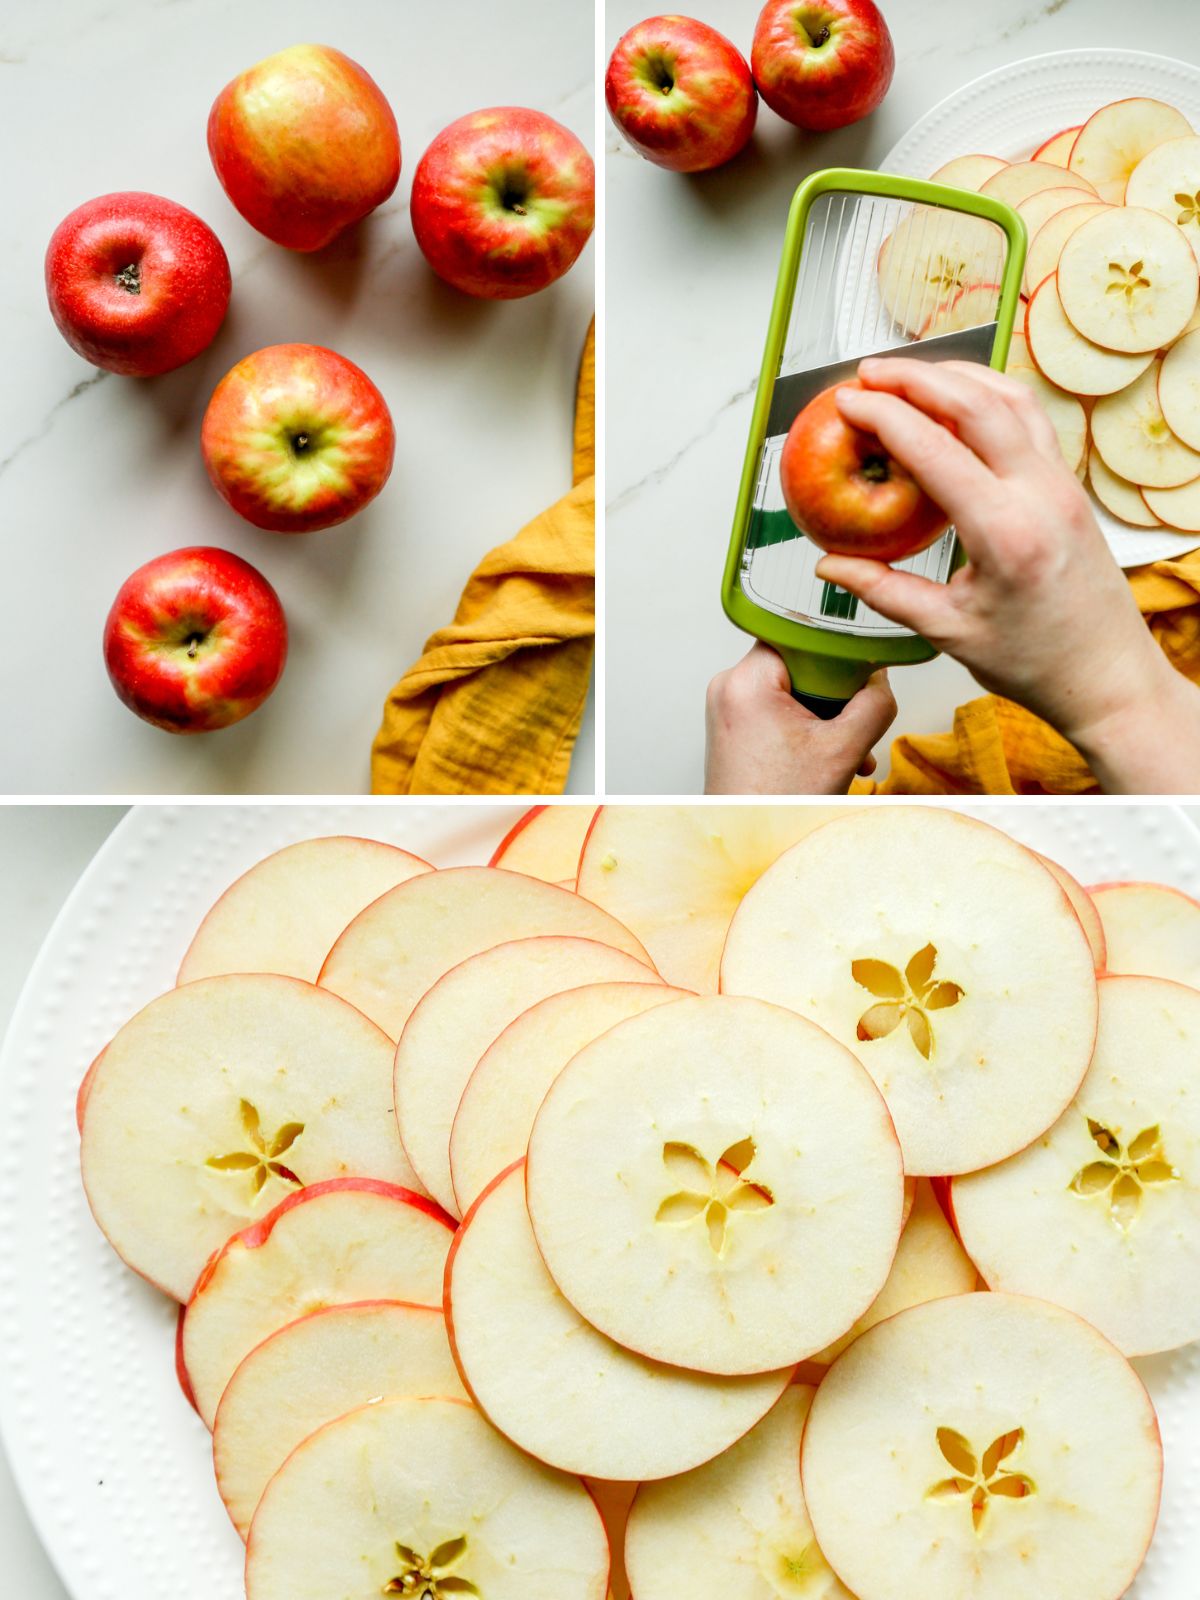
1. Start by washing and drying the apples to remove any dirt or wax.
2. Next, core (or leave the core in) the apples and slice them into thin, even slices.
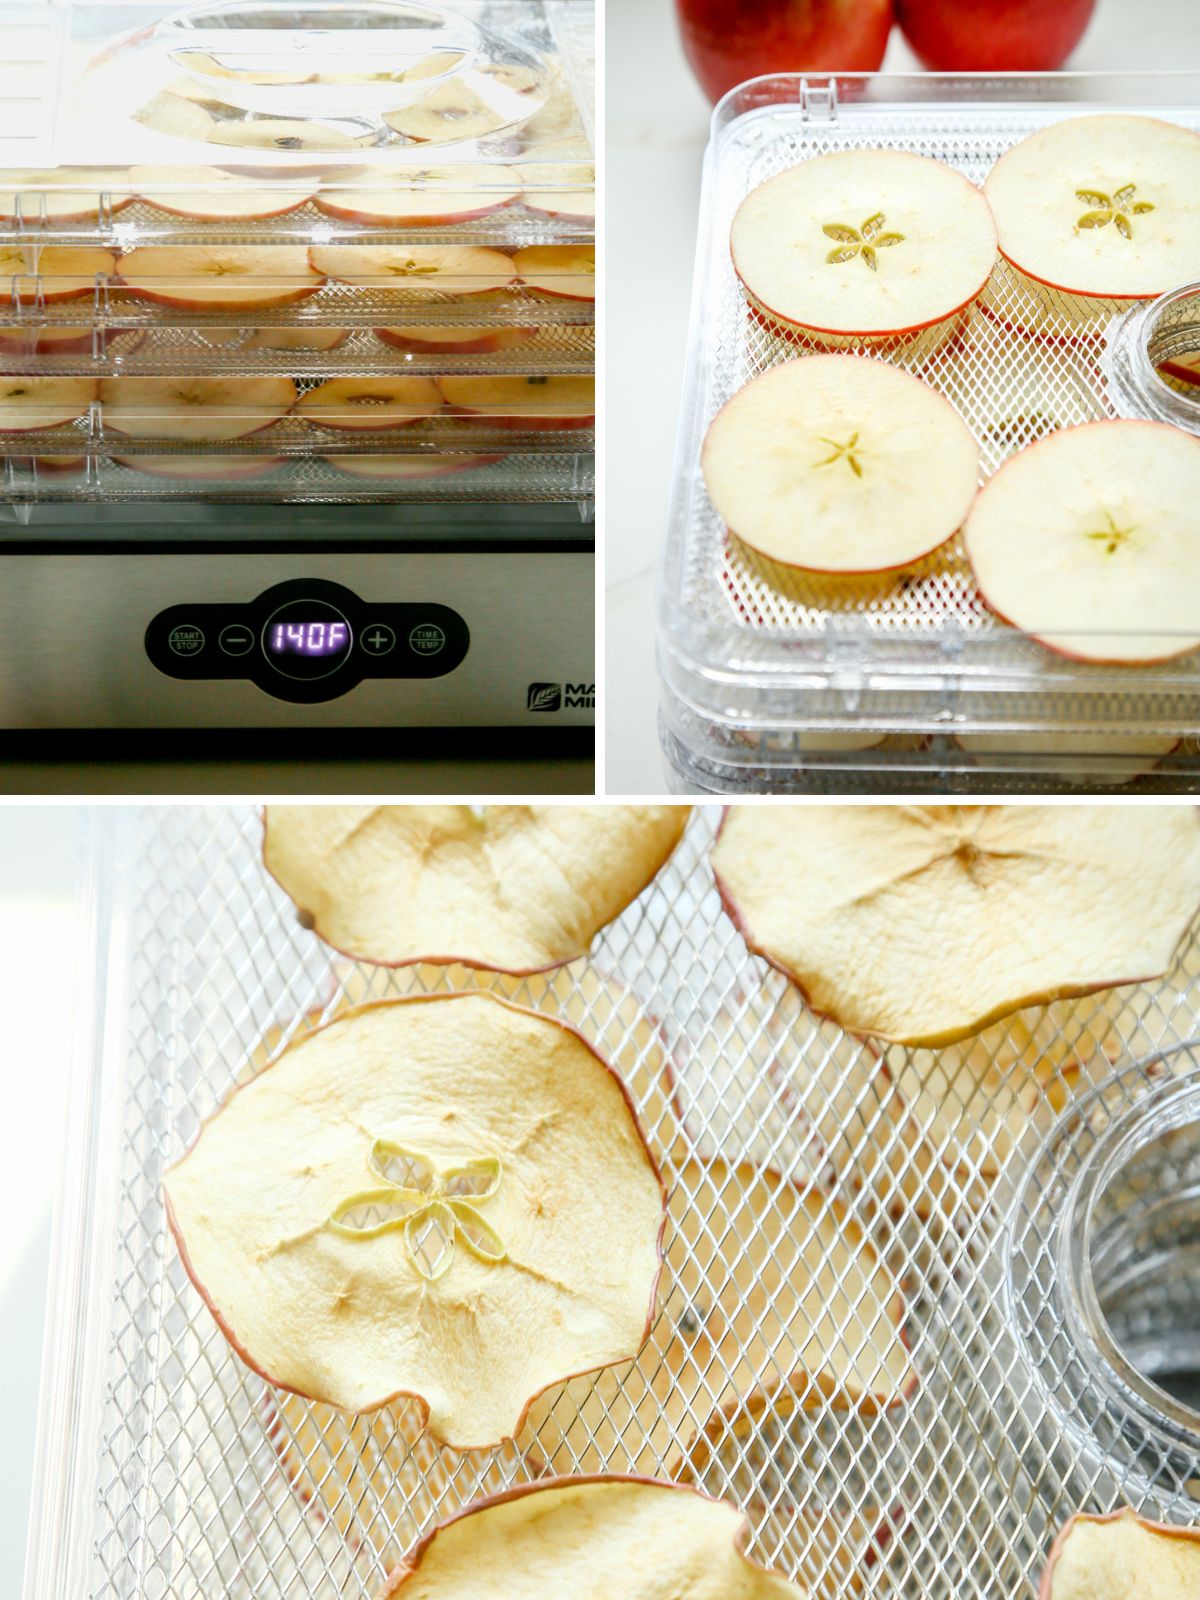
4. Arrange the slices on a dehydrator tray, making sure they are not overlapping.
5. Set the dehydrator to a temperature of around 140°F (60°C) and let it run for about 5-7 hours, or until the apples are completely dry and crispy.
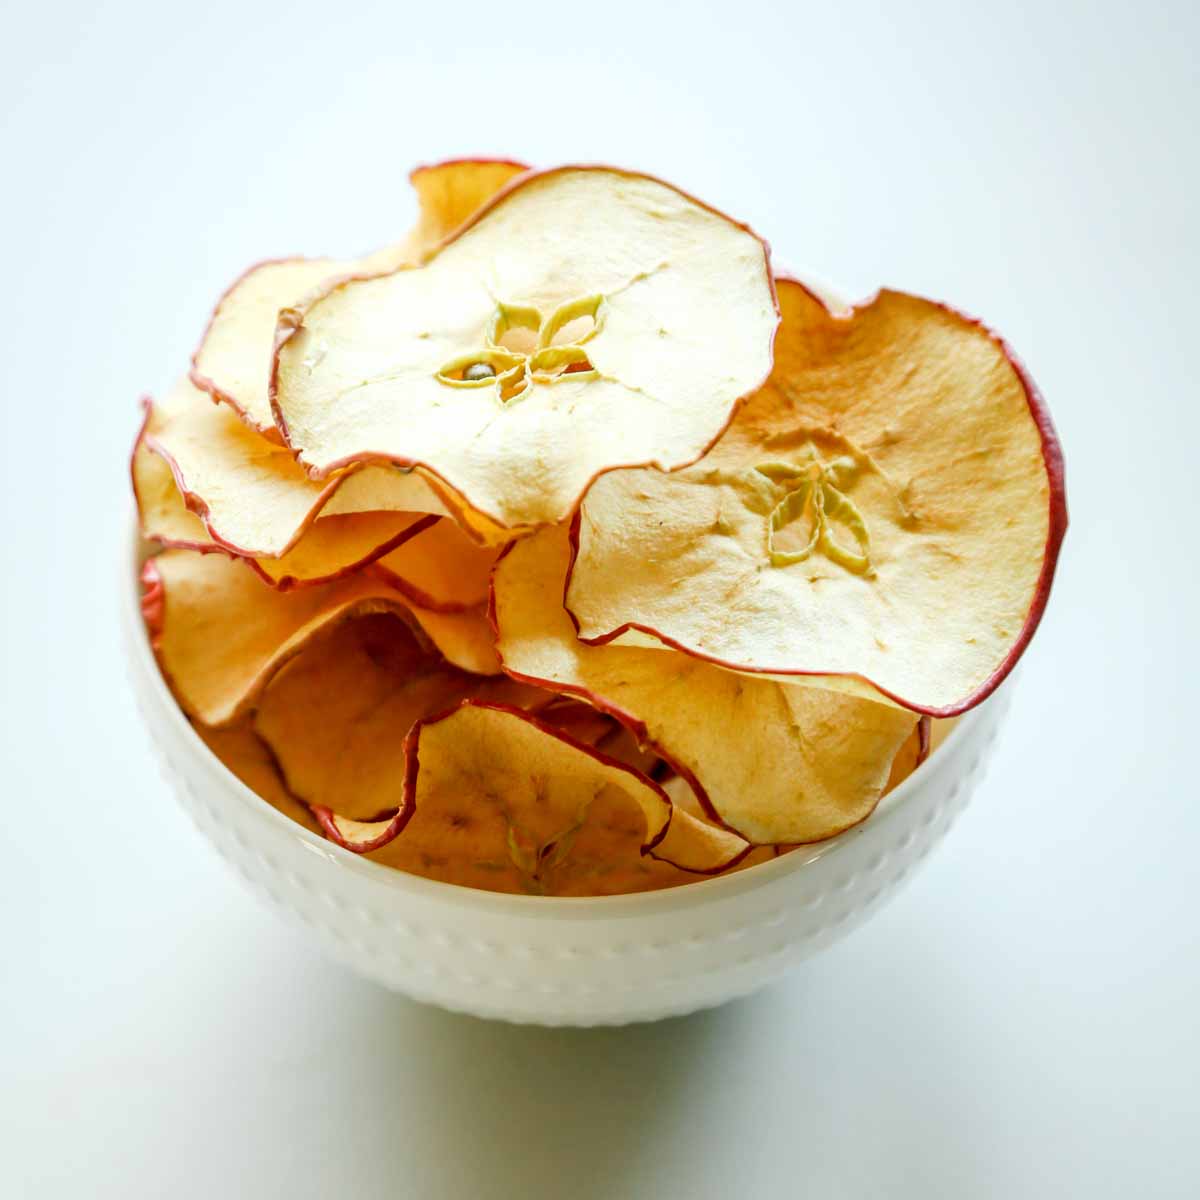
6. Once dried, allow the apple slices to cool before storing them in an airtight container or resealable bags for future use in snacks or recipes such as granola bars or trail mix.
7. For added flavor, you can sprinkle cinnamon or other spices on the apple slices before dehydrating them for a tasty twist!
What Kind of Apple to Dehydrate
- Fuji
- Pink lady
- Gala
- Green apple
- Crimson Crisp
Tip: Pre-treat the apple slices with lemon juice to prevent browning. This step will help maintain their natural color and appearance throughout the dehydration process.
Equipment
If you're new to dehydrating, getting started can be overwhelming.
Start with a smaller dehydrator and make smaller batches. If you enjoy the process, upgrade to a larger dehydrator and increase the batch size.
I have the Magic Mill Food Dehydrator and I like it A LOT. It's small, but I will eventually upgrade to a larger one.
How to Store
To store dehydrated apples, it is important to keep them in an airtight container or a vacuum-sealed bag. This will help to prevent moisture from entering and spoiling the apples.
Additionally, storing them in a cool, dark place such as a pantry or cupboard will help to maintain their quality and extend their shelf life.

How to Dehydrate Apples
- Total Time: 5 hours 5 minutes
- Yield: 4 people
Description
Dehydrating apples at home is the best way to preserve their natural freshness and extend their shelf life. With a few simple steps, you can confidently enjoy your dehydrated apples for longer periods without worrying about spoilage or loss of flavor.
Ingredients
- apples
Instructions
- Begin by washing the apples with water to remove any dirt or wax. After washing, dry the apples with a clean towel to make sure they are free of moisture.
- Next, core the apples and slice them thinly and evenly.
- Arrange the slices on a dehydrator tray, making sure they are not overlapping.
- Set the dehydrator to 140°F (60°C) and run for 5-7 hours or until apples are dry and crispy.
- After drying, cool the apple slices before storing them in airtight containers or resealable bags for later use in snacks or recipes like granola bars or trail mix.
- For added flavor, you can sprinkle cinnamon or other spices on the apple slices before dehydrating them for a tasty twist.
Notes
Do you have to soak apples before dehydrating?
Soaking apples before dehydrating is not necessary, but it can help enhance the final texture and taste of the dried apples. Some people prefer to soak them in a solution of lemon juice and water to prevent browning and add a hint of citrus flavor.
How long does it take to dehydrate apples?
The time it takes to dehydrate apples can vary depending on several factors. Generally, it can take anywhere from 6 to 12 hours to dehydrate apples at a temperature of around 135°F (57°C). However, factors such as the thickness of the slices, humidity levels, and the type of dehydrator being used can all affect the drying time.
To keep dehydrated apples fresh, store them in an airtight container or resealable bag. Keep the container in a cool and dry place away from sunlight to extend shelf life.
- Prep Time: 5 minutes
- Category: Snacks
- Cuisine: American
Looking for other recipes like this? Try these:


Leave a Reply